
Starting your React installation guide journey? You’re in exactly the right place! Whether you’re a complete beginner wondering how to install React or an experienced developer looking for the fastest React setup tutorial, this comprehensive guide covers everything you need.
I’ll walk you through two popular methods: Create React App installation and install React with Vite – both excellent choices depending on your project needs. By the end of this tutorial, you’ll have React running smoothly on your machine and understand which approach works best for different scenarios.
Let’s dive into this step-by-step React CRA and Vite installation process that works perfectly on Windows, macOS, and Linux!
What is React?
React has revolutionized frontend development since Facebook introduced it. Think of React as your toolkit for building interactive websites – instead of writing complex code to update every element on your page, React handles these updates intelligently through something called a “virtual DOM.”
Here’s what makes React special for frontend development with React:
- Component-based architecture: Build reusable pieces of UI
- Declarative programming: Describe what you want, React figures out how
- Massive ecosystem: Thousands of libraries and tools available
- Active community: Constant improvements and excellent support
- Performance optimization: Virtual DOM ensures fast rendering
- SEO-friendly: Server-side rendering capabilities
Whether you’re building a simple portfolio site or a complex web application, React’s flexibility makes it an excellent choice for modern web development.
Prerequisites for Installing React
Before we start our React setup tutorial, let’s ensure your system is ready for Node.js React installation:
Essential Requirements:
- Node.js (v16 or higher) – This includes npm automatically
- Code editor – Visual Studio Code is highly recommended
- Basic JavaScript knowledge – ES6 features especially helpful
- Terminal/Command Prompt access
- Stable internet connection – For downloading packages
Quick Node.js Verification:
bashCopynode --version
npm --version
If you see version numbers, you’re ready! If not, download Node.js from nodejs.org – it’s completely free and installs in minutes.
Recommended System Specifications:
- RAM: 4GB minimum, 8GB recommended
- Storage: 2GB free space for development tools
- Operating System: Windows 10+, macOS 10.14+, or modern Linux distribution
Installing React with Create React App (CRA)
Create React App installation remains the most beginner-friendly approach for React CRA setup. Facebook created this tool specifically to eliminate configuration headaches, so you can focus on learning React instead of wrestling with build tools.
Step 1: Create Your Project
bashCopynpx create-react-app my-react-app
This single command performs several important tasks:
- Downloads the latest React version
- Sets up Webpack for bundling your code
- Configures Babel for modern JavaScript features
- Creates a development server with hot reloading
- Includes testing framework setup
- Adds ESLint for code quality
Step 2: Navigate and Start Development Server
bashCopycd my-react-app
npm start
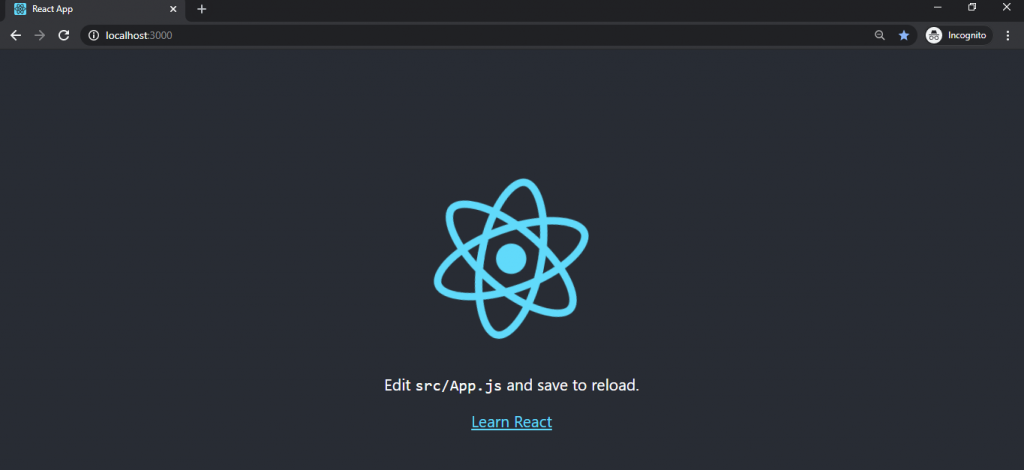
Your browser will automatically open http://localhost:3000, displaying React’s welcome page. Congratulations – you’ve successfully completed your first React CRA setup!
Understanding the Project Structure:
javaCopymy-react-app/
├── public/
│   ├── index.html
│   └── favicon.ico
├── src/
│   ├── App.js
│   ├── App.css
│   ├── index.js
│   └── index.css
├── package.json
└── README.md
What You Get with CRA:
- Zero configuration required
- Hot reloading for instant development feedback
- Built-in testing framework with Jest
- Production build optimization
- ESLint integration for code quality
- CSS and Sass support out of the box
- Environment variable support
CRA Commands You’ll Use Daily:
bash Copynpm start          # Start development server
npm test           # Run test suite
npm run build      # Create production build
npm run eject      # Eject from CRA (irreversible)
Installing React with Vite

If speed is your priority, React Vite setup offers lightning-fast development experience. Vite (pronounced “veet”) leverages modern browser features for incredibly fast hot module replacement and install React with Vite provides superior performance.
Step 1: Create Vite Project
bash Copynpm create vite@latest my-vite-app -- --template react
Step 2: Install Dependencies and Start Development
bash Copycd my-vite-app
npm install
npm run dev
Your app launches at http://localhost:5173 – notice how quickly it starts compared to traditional bundlers!
Why Choose Vite for React Development?
- Extremely fast startup: Often under 1 second
- Instant hot updates: Changes reflect immediately
- Smaller bundle sizes: Optimized production builds
- Modern tooling: Supports latest JavaScript features
- Plugin ecosystem: Rich collection of plugins
- TypeScript support: Built-in TypeScript handling
Vite Project Structure:
arduinoCopymy-vite-app/
├── public/
│   └── vite.svg
├── src/
│   ├── App.jsx
│   ├── App.css
│   ├── main.jsx
│   └── index.css
├── index.html
├── package.json
└── vite.config.js
Vite vs CRA Performance Comparison:
| Feature | Create React App | Vite |
|---|---|---|
| Cold Start Speed | 10-30 seconds | 1-3 seconds |
| Hot Module Replacement | Good | Excellent |
| Bundle Size | Larger | Smaller |
| Build Speed | Moderate | Fast |
| Configuration | Zero-config | Minimal config |
| Learning Curve | Easier | Slightly steeper |

Essential Vite Commands:
bashCopynpm run dev        # Start development server
npm run build      # Create production build
npm run preview    # Preview production build locally
npm run lint       # Run ESLint (if configured)
React Setup Windows Mac Linux
The beauty of Node.js React installation is its cross-platform compatibility. Here’s how to optimize your React setup Windows Mac Linux experience for each operating system:
Windows React Installation
Method 1: Using PowerShell (Recommended)
bash Copy# Open PowerShell as Administrator
npx create-react-app my-windows-app
cd my-windows-app
npm start
Method 2: Using WSL (Windows Subsystem for Linux)
bash Copy# Install WSL first, then in WSL terminal:
npx create-react-app my-wsl-app
cd my-wsl-app
npm start
Windows-Specific Tips:
- Use PowerShell or Windows Terminal for better experience
- Consider WSL2 for Linux-like development environment
- Install Git for Windows for version control
- Use Windows Defender exclusions for node_modules folders
macOS React Installation
Using Terminal (Built-in)
bash Copy# Install Node.js using Homebrew (recommended)
brew install node

# Verify installation
node --version
npm --version

# Create React app
npx create-react-app my-mac-app
cd my-mac-app
npm start
macOS-Specific Tips:
- Use Homebrew for package management:
brew install node - Terminal.app works perfectly for development
- Consider iTerm2 for enhanced terminal features
- Use Xcode Command Line Tools:
xcode-select --install
Linux React Installation
Ubuntu/Debian:
bash Copy# Update package manager
sudo apt update

# Install Node.js and npm
sudo apt install nodejs npm

# Verify installation
node --version
npm --version

# Create React app
npx create-react-app my-linux-app
cd my-linux-app
npm start
CentOS/RHEL:
bash Copy# Install Node.js and npm
sudo yum install nodejs npm

# Create React app
npx create-react-app my-centos-app
Arch Linux:
bashCopy# Install Node.js and npm
sudo pacman -S nodejs npm

# Create React app
npx create-react-app my-arch-app
Linux-Specific Tips:
- Use your distribution’s package manager when possible
- Consider nvm (Node Version Manager) for multiple Node.js versions
- Most Linux terminals work excellently out of the box
- Ensure proper file permissions for development folders
Installing React Using npm vs Yarn
Both package managers work perfectly for install React using npm scenarios. Here’s a detailed comparison:
Using npm (Default with Node.js):
bash Copy# Create React app with CRA
npx create-react-app my-npm-app
cd my-npm-app
npm start

# Create React app with Vite
npm create vite@latest my-vite-npm -- --template react
cd my-vite-npm
npm install
npm run dev
Using Yarn (Alternative Package Manager):
bash Copy# Install Yarn globally
npm install -g yarn

# Create React app with CRA
yarn create react-app my-yarn-app
cd my-yarn-app
yarn start

# Create React app with Vite
yarn create vite my-vite-yarn --template react
cd my-vite-yarn
yarn install
yarn dev
npm vs Yarn Comparison:
| Feature | npm | Yarn |
|---|---|---|
| Installation Speed | Moderate | Faster |
| Disk Space Usage | More | Less |
| Security | Good | Excellent |
| Lockfile | package-lock.json | yarn.lock |
| Offline Mode | Limited | Full support |
| Learning Curve | Standard | Minimal difference |
Which Should You Choose?
- npm: Standard, reliable, comes with Node.js
- Yarn: Faster downloads, better dependency resolution, improved security
Both achieve identical results – choose based on your team’s preference and project requirements!
Troubleshooting Common Installation Issues
Even with the best React installation guide, you might encounter issues. Here are solutions to common problems:
Permission Errors (Windows/Linux)
Problem: EACCES: permission denied
Solution for Linux/macOS:
bash Copy# Fix npm permissions
sudo chown -R $(whoami) ~/.npm
sudo chown -R $(whoami) /usr/local/lib/node_modules
Solution for Windows:
bash Copy# Run PowerShell as Administrator
npm config set prefix %APPDATA%\npm
Port Already in Use Error
Problem: Port 3000 is already in use
Solutions:
bash Copy# Method 1: Use different port
npm start -- --port 3001

# Method 2: Set environment variable
PORT=3001 npm start

# Method 3: Kill process using port
# Windows:
netstat -ano | findstr :3000
taskkill /PID <PID> /F

# macOS/Linux:
lsof -ti:3000 | xargs kill -9
Node.js Version Compatibility Issues
Problem: React requires newer Node.js version
Solution using nvm:
bash Copy# Install nvm (Node Version Manager)
curl -o- https://raw.githubusercontent.com/nvm-sh/nvm/v0.39.0/install.sh | bash

# Install latest Node.js
nvm install node
nvm use node

# Verify installation
node --version
npm Cache Issues
Problem: Package installation fails or corrupted
Solution:
bash Copy# Clear npm cache
npm cache clean --force

# Delete node_modules and reinstall
rm -rf node_modules package-lock.json
npm install
Network and Firewall Issues
Problem: Cannot download packages
Solutions:
bash Copy# Use different npm registry
npm config set registry https://registry.npmjs.org/

# Check proxy settings
npm config list
npm config delete proxy
npm config delete https-proxy

# Use company registry (if applicable)
npm config set registry http://your-company-registry.com
Memory Issues During Installation
Problem: JavaScript heap out of memory
Solution:
bash Copy# Increase Node.js memory limit
export NODE_OPTIONS="--max-old-space-size=4096"

# Or for Windows:
set NODE_OPTIONS=--max-old-space-size=4096
Advanced Installation Options
Manual React Setup (Without CRA)
For experienced developers wanting complete control over the build process:
bash Copy# Create project directory
mkdir my-custom-react-app
cd my-custom-react-app

# Initialize npm project
npm init -y

# Install React dependencies
npm install react react-dom

# Install development dependencies
npm install --save-dev webpack webpack-cli webpack-dev-server
npm install --save-dev babel-loader @babel/core @babel/preset-react
npm install --save-dev html-webpack-plugin css-loader style-loader
TypeScript Integration
CRA with TypeScript:
bash Copynpx create-react-app my-typescript-app --template typescript
Vite with TypeScript:
bash Copynpm create vite@latest my-vite-ts-app -- --template react-ts
Adding Popular Libraries
bash Copy# React Router for navigation
npm install react-router-dom

# State management
npm install redux react-redux
# or
npm install zustand

# UI component libraries
npm install @mui/material @emotion/react @emotion/styled
# or
npm install antd

# HTTP client
npm install axios
Testing Your React Installation
Verify CRA Installation:
bash Copycd my-react-app
npm test -- --watchAll=false
Verify Vite Installation:
bash Copycd my-vite-app
npm run build
npm run preview
Create Your First Component:
jsxCopy// src/components/Welcome.jsx
import React from 'react';

function Welcome({ name }) {
  return (
    <div>
      <h1>Welcome to React, {name}!</h1>
      <p>Your React installation is working perfectly!</p>
    </div>
  );
}

export default Welcome;
Performance Optimization Tips
Development Environment:
- Use SSD storage for faster file operations
- Increase available RAM for smoother development
- Close unnecessary applications during development
- Use code editor extensions for React development
Build Optimization:
bash Copy# Analyze bundle size (CRA)
npm install --save-dev webpack-bundle-analyzer
npm run build
npx webpack-bundle-analyzer build/static/js/*.js

# Vite bundle analysis
npm run build
npx vite-bundle-analyzer dist
Conclusion
Congratulations! You’ve successfully mastered both Create React App installation and React Vite setup methods. Whether you chose CRA for its zero-configuration approach or Vite for its lightning-fast development experience, you now have a solid foundation for frontend development with React.
Remember these key takeaways:
- CRA is perfect for beginners and projects requiring zero configuration
- Vite excels in speed and modern development workflows
- Both methods work across all operating systems with proper Node.js installation
- Troubleshooting skills will save you hours of frustration
Your React installation guide journey doesn’t end here – now it’s time to start building amazing user interfaces! Whether you’re creating your first component or planning a complex application, you have all the tools needed for success.
Start with small projects, experiment with different features, and don’t hesitate to consult the official React documentation when you need guidance. Happy coding!
FAQ
1. What is the best way to install React in 2025?
The best React installation guide approach depends on your specific needs and experience level. For beginners and rapid prototyping, Create React App installation provides a zero-configuration setup that includes Webpack, Babel, and a development server out of the box, allowing you to start coding immediately without worrying about complex toolchain details.
However, if you prioritize faster startup times and leaner builds, install React with Vite is an excellent alternative. Vite leverages native ES modules for near-instantaneous hot module replacement and significantly faster cold starts. Choose CRA for stability and convention, and Vite for speed and modern development workflow.
2. Do I need Node.js for React installation?
Yes, Node.js React installation is absolutely essential because Node.js includes npm (Node Package Manager) and supports Yarn as well. These package managers handle downloading React’s core library, its dependencies, and any additional modules you include in your application.
Beyond package management, Node.js provides the runtime environment for development tools such as linters, test runners, build scripts, and the development server itself. Without Node.js, you cannot run the React setup tutorial commands or manage your React project effectively, making it a cornerstone of the modern JavaScript development ecosystem.
3. How do I install React on Windows?
For React setup Windows Mac Linux, Windows offers several approaches. You can use PowerShell or Command Prompt with the standard installation process. First, install Node.js from the official website or via package managers like Chocolatey (choco install nodejs).
If you prefer a Unix-like environment, set up Windows Subsystem for Linux (WSL) and install Node.js inside that environment to maintain consistency with Unix-style commands. Once Node.js is ready, navigate to your project folder and run npx create-react-app my-app for CRA or npm create vite@latest my-vite-app -- --template react for React Vite setup.
4. Can I use React without Create React App?
Absolutely! While React CRA provides convenience, you have complete freedom to set up React manually for full control over your build process. You can configure React with tools like Webpack and Babel from scratch, allowing you to tailor configurations for code splitting, asset optimization, custom plugins, and specific performance requirements.
This manual approach requires more initial setup and ongoing maintenance but is ideal for complex projects with specific requirements. Alternatively, other scaffolding tools like Next.js for server-side rendering, Gatsby for static site generation, or Remix for full-stack applications can provide additional features and optimizations beyond basic React functionality.
5. Is Vite better than Create React App for React projects?
React Vite setup generally outperforms Create React App installation in terms of development speed and modern tooling, thanks to its native ES module support and on-demand compilation, which significantly reduce cold starts and hot update times. Vite typically starts in 1-3 seconds compared to CRA’s 10-30 seconds.
However, CRA comes with a battle-tested configuration that works seamlessly across a wide range of environments, has extensive documentation, and benefits from Facebook’s ongoing support. If you prioritize rapid iteration, minimal configuration, and cutting-edge performance, Vite is the better choice. If you need a robust, community-supported setup with proven stability, CRA remains an excellent option.
6. Does React work on macOS and Linux?
Yes, React runs perfectly on any operating system that supports Node.js, including macOS and Linux distributions. The React setup Windows Mac Linux process is remarkably consistent across platforms. On macOS, you can install Node.js using Homebrew (brew install node) for easy package management, while on Linux, you can use your distribution’s package manager (apt, yum, pacman) or nvm for version management.
Once Node.js is installed, the commands for creating and running a React project using install React using npm are identical across all platforms, ensuring a consistent developer experience whether you’re working on Windows, macOS, or Linux systems.
7. What additional tools should I install for React development?
Beyond the basic React installation guide requirements, several tools will significantly enhance your frontend development with React experience. Install Git for version control, ESLint and Prettier for code linting and formatting, and Husky for managing Git hooks and ensuring code quality.
Consider adding TypeScript for static type checking to catch errors at compile time, React Router for navigation in single-page applications, and state management libraries like Redux or Zustand. Testing libraries such as Jest and React Testing Library are essential for validating components and behavior, while performance tools like Webpack Bundle Analyzer help optimize bundle size and identify optimization opportunities.